Thursday, May 31, 2012

Making Ravioli with Chef Sweet Pea

Hello readers, did you get the joke?

(I have a famous role model right now ;] )

Today I'm making ravioli for the first time!! It's pretty interesting. Also, the warm weather makes it easier to knead and mix the dough...though it makes it stickier too :P

So far I've used:
  • flour 450 grammes and extra for dusting board/counter/place you roll dough/rolling pin
  • eggs 6
  • filling (I will include my recipe later I used Spam & hot-dog, this is up to you and whatever ravioli you desire :] )
As I said before, eggs are cracked on by one into a separate dish before being added one by one to the bowl. Afterwards the flour is poured into the bowl and it is mixed with a fork, slowly, until fully incorporated.


Once fully incorporated, I knead it until it is elastic. The way I knead is fold and half, turn it a quarter turn, fold it and half, then push down and away from myself into the dough with my palms. Once you have an elastic dough ball, wrap it in plastic wrap and let it relax for 30 minutes at room temperature.


Snug in the cling wrap


Afterwards, take a third of the dough and put it onto a flat surface and start to roll it out. Be sure to flip it over every now and then so that it doesn't stick, and sprinkle flour onto the surface as necessary. Try for a rectangle shape. When making this, I rolled it out to about 1 mm thin, but the thinner it is the better it tastes, so try to go for thin--though not paper thin. Follow the pictures for how to seal the ravioli.

Method 1:
Cut into strips, cut one strip into squares and put filling on each square

Place strip over squares

Cut into individual pieces and press edges with fork to seal
 Method 2: the much easier way

Make two strips, line up fillings on one strip, then flop other strip over the fillings and seal by pressing edges with fork then cut into individual pieces


Note: if you have a pasta roller, use it, I'm sure tons easier

om nom nom


Though not pretty, my ravioli was a delicious and filling dinner.
If you were wondering, that's some cream of mushroom sauce.

Hope you can make tasty ravioli too ^_^'

Sweet Pea

Wednesday, May 30, 2012

Old Bananas? FEAR NOT!!~~ A lesson on banana cake

My house smells like bananas...
SWEET PEA'S HOUSE 17:30 WEDNESDAY AFTERNOON


Oh, hello reader, how are you today?
Do you have spotted bananas in your house like I do?
Do you question what to do with such bananas?
Or do you scarf them down in an attempt to rid yourself of them? (like I do with most leftovers XP )


Well, FRET NOT, dear reader, for today is that day when that problem is solved.
The solution?
da da da da...
BANANA CAKE
(Did you read the full title? In that case you probably weren't surprised.)


Note: this recipe is a modification of plain vanilla cake (not mine) HIGHLY EXPERIMENTAL


Warm up your oven to 350 degrees (Fahrenheit)

Note: This took my about 3 hours to make, including the time I stopped to do other things, start to finish


Be sure to grab:

  • flour 200 grammes
  • sugar 200 grammes
  • butter 1 stick (aprox 115 grammes)
  • eggs 2
  • milk 120 mL
  • baking powder 2 tsp
  • bananas 2-4 depending on how much you like bananas ( add an additional 50-75 grammes of flour if you use 3 or 4 bananas)
Allow your butter to warm up to room temperature, then mash it with a fork. I know that the last time cake was made I mashed the butter with the sugar, but it's easier if you mash the butter alone, then add the sugar. That said, when you're done mashing the butter, mash in the sugar.


After mashing your sugar and butter, mash in the bananas, followed by stirring in the flour.
When mashing the bananas, mash them as finely or coarsely as you like--just know that they get more liquid the more they are mashed.

Weather changes the conditions of cooking, and if you find your mixture stiff, mix the milk then flour; if you find it more loose, feel free to add the flour first.

Note: Today I have been consistently 5 grammes off (with the sugar and flour)


Mix in your eggs, and milk if you haven't already, and feel free to add a dash of vanilla at this point. You may now add your baking powder, and after stirring thoroughly, pour your cake into your baking pan of choice and bake for 30-40 Update/Correction 45-55 minutes.


The cake browns like a waffle...and it browns a lot...I suppose if you don't want it to brown so much, you could loosely cover your pan with a tin foil tent.

The cake is remarkably fluffy, almost as much as sponge cake--currently fresh out of the oven.


The cake is undone, so I flipped it onto a plate...it's uncooked on the bottom...the plate is oven safe, into the oven it goes.

15 minutes later...
It's all good. (Correction made, see strike-through).

Looks like a cheese round, haha


Brown Bananas Bake into Banana Bread cake (:
(try saying that 5 times fast, haha)

Have fun making and baking (and enjoy my tongue twister)

Sweet Pea

Sunday, May 27, 2012

The Making of Multicolor Jello

Hey readers,
Sorry about not updating Saturday, life happens >.<
Though I cooked Saturday, there wasn't the time to post.

At any rate, something that I like to eat on hot summer days is jello, and it's great since it's cool and smooth and very refreshing after a hot day in the sun. But, sometimes it gets a little boring to eat the same old thing over and over, so I decided to make some multi-color jello.

You can start by grabbing your favorite flavors of jello. I made a three layer three flavor combo, but you can use two flavors or layers if you like. Here's what I used to make my jello dessert, feel free to edit the list to your  tastes:

  • 1 pack of cherry jello
  • 1 pack of lime jello
  • 1 pack of raspberry jello
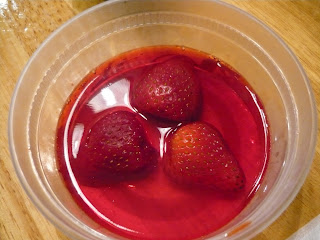
  • strawberries
  • mandarin orange slices (the ones in water/light syrup)

The first thing to do is prepare your jello according to the package's instructions, and allow it to set until firm. I chose to add fruits to mine before putting it in the fridge, and my suggestion is that if you want to arrange the fruits, that you'd better have a steady hand when placing the cup/bowl of unset jello into the fridge since the fruit moves easily.


Once your jello is set, prepare your second flavor of jello according to the directions, but don't pour it into your containers just yet. Allow it to sit in the fridge anywhere from 15-30 minutes so that it can cool down.  My first layer was cherry.

While you wait, here's a simple design for jello.
You can take this time to add the next layer of fruit to your jello.

Tada~
After letting that cool, you can add it to your jello containers. Pour slowly so that you don't disturb your jello.

Layer two complete.

Lime layer.
Same process goes for the third layer. My final layer is raspberry. You can add more layers if you like though.

If you want thin strawberries, slice them slowly.
Final product:

Jello is jiggly~
Also, you could make this red (cherry, raspberry) white (pudding, whip cream) and blue (berry blue) for memorial day :)

Happy Memorial Day~

Sweet Pea

Wednesday, May 23, 2012

Little Panda Bento

Dear readers, I have been low on time lately, and the kitchen is suffering, but this weekend and next week is much more time, so look forward to it!!

Also, I officially declare this blog to be updated on Wednesdays and Saturdays.

Today I am making mini-panda bento. It's a little bento with a lot of cuteness!!

For the panda you need:
  • white cheese
  • seaweed sheet
For the bento you need:
  • rice (any type you like)
  • ketchup (or your choice of a similar texture and color sauce)
Select a container for your bento


Then fill it with rice. To make the top smooth, wet a spatula and use the spatula to press down and smooth the top of the rice.

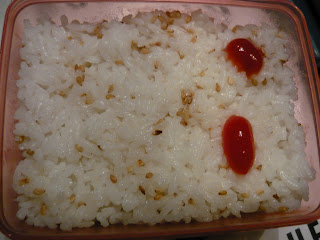
Sesame rice, recipe at bottom.

Place two blobs of ketchup onto the rice, then spread them out with a butter knife...


...to make hearts.

The bottom heart is so cute--it's better since the smoothed rice.
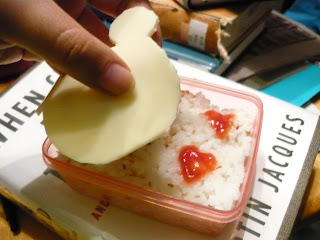
 Cut out a bear shape from your cheese, like the picture.

This will become our panda
Pick up your panda gently and hold it by the middle since the ears are rather delicate, then place it onto your rice.


Then cut out two circles of seaweed, and place them shiny side up onto the cheese. Be very careful since once you put it down, it's hard to remove afterwards.


 Then cut out two smaller ovals for eyes.


Cut out a wide 'v' for the mouth, and little panda bento is done!!


 Here is recipe for sesame rice:

  • sesame seeds (judge how much to use by how much rice you have, use the picture as a reference)
  • rice
  • chicken powder (optional)
Place ingredients in a bowl


Mix and you're done!!


Hope you like your little panda bento!!

Sweet Pea


Saturday, May 19, 2012

Nostalgia & Miso Soup

Hello reader,
Have you ever eaten enoki mushrooms?

<3
I love enoki mushrooms, they are definitely in my top list for favorite ingredients. They're what makes this miso soup so nostalgic for me, I haven't had them in ages. If you haven't had them, I would say that you would probably like them if you like foods like udon noodles.

To make this miso soup you will need:
  • tofu
  • enoki mushrooms ( I used 150g)
  • miso
  • scallion

Let's start ourselves off by boiling a half a pot of water.

The next thing is cubing the tofu. I like to have small bite size cubes that are around 1 cm. If you have trouble cubing tofu, here are three easy steps to guide you:
  1. Slice across and down (vertical slices)
  2. Slice across the middle of the tofu (making layers)
  3. Slice the other way (vertical slices again) and the cubes will form


You don't need very much tofu

Step 1

Step 2

Step 3
Now add your tofu cubes to your pot of boiling water, be careful that the tofu doesn't have to fall too far to get into the pot, otherwise you may end up being splashed by boiling water.

Let this boil for 15 minutes. During this time prepare the enoki mushrooms. This is as easy as:
  1. Rinse mushrooms and cut off roots
  2. Split mushrooms and rinse again (split them big or small as you please)


Step 1


Step 2

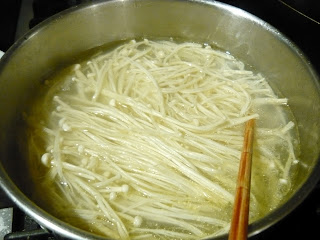
Once the 15 minutes has passed, add the enoki mushrooms to the pot as well as miso, then turn the heat to medium and stir it occasionally.

Note: For the amount of miso, I take a sundae spoon--or any spoon where the head is no wider than a quarter--and using this spoon put 2 heaping spoonfuls of miso into the pot and stir.
I didn't add miso yet, but this is what your soup should look like so far.

The last ingredient that we will add is scallion. Simply wash it, and then cut off short bits into the pot until you reach the white part.

Note: Cut off the very end of the scallion before adding any to your soup, as it's dried out...a tip from my mom :)

SCALLION END? NOT SAVORY

Let it cook for 5 more minutes and you're done.

Finally <3

And now I'll be eating some miso soup in my piggy bowl. It's delicious.

Piggy bowl :D

May you drink delicious miso soup~

Sweet Pea

Wednesday, May 16, 2012

Backyard Tea

Hey guys, I thought it would be cool to do a quick lesson on making tea from backyard ingredients.


I'm not sure everyone has a backyard like mine, but mint and heart clover grows wild, so it's easy to get the ingredients for tea.


Today we are making two teas:

  1. Mint tea
  2. Heart clover tea
Let's start with the mint tea. You will need:
  • 4 sprigs of mint (any type) each about 6" long, washed

This is spearmint
Strip the leaves off until all you have is the stalks, and deposit your leaves into your tea pot/press.
I guess if you really wanted to you could just put the whole stalks in...

A whiff of this smells great
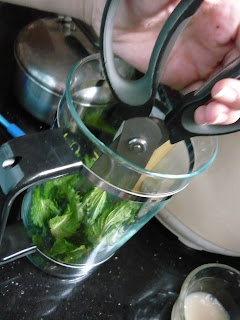
Once you have taken the leaves off, cut them up. I choose to cut them up while in the tea press so that I don't have to move itty bitty mint pieces. Once cut up, add hot water and let them steep.
chop chip chop

Boiled, microwaved, any way you choose to heat your water shouldn't taste any different (in my opinion)

The fog...

The mint usually floats

You can cut it up more after it floats if you want...

The pieces should be about this size
If using a tea press, be sure to lower the plunger so that the mint is submerged.
And press

Does not need to be very submerged, just below water level
You will know when it is done because it will look like this, a yellowed color.
Ready to drink
For those of you with a tea press, completely lower the plunger and then pour yourself a cup of tea. This tea tastes good with 3 cubes of sugar per cup of tea :)
Minty fresh!!


Enjoy the minty mint tea :)


Sweet Pea