 |
| Taro returns...but this time it's BIG TARO :D (looks like bacon to me o.O) |
- big taro (as opposed to small taro I used in sai mai lo)
- 2 tsp flour
- 4 tsp water (that's H2O for all the nerds out there ;]
First things first, wash the taro!!
WARNING: YOUR TARO MAY SHED/LOSE SOME HAIR, BUT IT'S OKAY!! (if not a little hairy XD)
 |
| It's BIG TARO!! Has fine lines inside...the lines tasted of nothing...also the center is more purple, and feels spongy... |
Next step is to peel off some of the skin--not all because I didn't use all the taro. I peeled about one or two inches off.
Now it's time to grate the taro. I find that the hairyness of the skin makes for easy gripping. Also safer since you're less likely to slip. I do this on top of a wooden cutting board because I find it's easier and that I slip less this way (in a way, safer).
A word of advice, the taro is slippery--the peeled part--so don't rush the grating/shredding.
Once you feel you have enough shredded, lift up the grater to check, like I did. If you have enough, then transfer your taro to a bowl. If not, continue shredding. You need about 3/4 cup to 1 cup of shredded taro.
I like to take a moment to admire my handiwork :)
And also to clean the grater -__-'
Now that the taro is in a bowl, and your grater is clean (hopefully), measure two teaspoons of flour--if you haven't already--and add it to the taro.
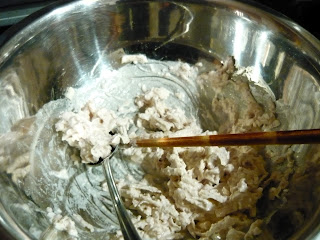
You can use a chopstick, which would work well, but I just mixed it with my fingers.
Now it's time to add 4 teaspoons of your water/H2O.
Note: mix starts to get sticky here
Add salt or whatever spices you like. Then stir.
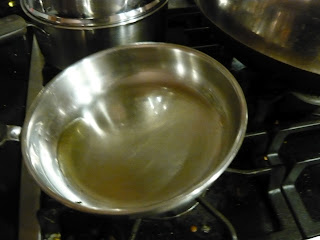
Now heat up some oil (vegetable, olive, peanut, your choice) in a skillet. Cooking spray would also work.
And swirl the pan so it gets coated with oil. If you don't know what I mean, never fear--I have pictures and captions ;D
Swirl completed!!
Now prepare a small spoonful of batter...
When the oil is nice and hot drop the spoonful in.
You must wait until the bottom is browned. Keep pan on medium or medium low heat.
If you're really concerned it will stick, as it likely will, move it around with a spatula before flipping.
Once brown and crunchy on one side, you may flip...unless you want it browner. Then wait, and then flip.
I like to smush it down after flipping it.
And for you enjoyment, many more pictures with captions :D feel free to skip to end at this point...I'm really tired...and sleepy...
And now you have fried taro, ready to eat with anything your heart desires. The flavor is very much taro. All you will taste is taro...or maybe tostados, since they taste a bit like tostados...
The adventures will continue...after some sleep...
ZZzzzz.....
Sweet Pea
 |
| Peeling: done. |
 |
| Pyramid grater makes an appearance!! |
 |
| Shredding the taro is a bit messy |
 |
| What an interesting pattern :O |
 |
| Checking progress here... |
 |
| Mission complete!! |
And also to clean the grater -__-'
 |
| Must...clean...grater...to make...life...easier!! |
 |
| Taro in bowl, all alone... |
 |
| Flour, I'd like you to meed my shredded friend...taro!! |
 |
| Close up before mixing, looks like Mt. Fuji!! Or a really bad snowman...XP |
 |
| Mix until most taro is covered in flour |
Note: mix starts to get sticky here
 |
| Now would be the time to stir with a chopstick since it gets sticky |
 |
| Salt is good enough for me (: |
 |
| Stir thoroughly...or fear the flavor/bland clump o.o |
 |
| I think I added too much...less would likely work... |
 |
| Tilt to the right |
 |
| Downwards tilt |
 |
| And a tilt to the left |
Now prepare a small spoonful of batter...
 |
| It's a small spoon...shiny bowl...running out of clever things to say... |
 |
| PLOP!! |
 |
| First fried taro of the day/evening |
 |
| *sizzle* |
 |
| *sizzle~* |
 |
| *sizzle~~* |
 |
| If you get bored, like I do, poke it with a chopstick...helps to move it and prevent sticking, as well as alleviate boredom |
 |
| nudge |
 |
| nudge~ |
 |
| SHOVE |
 |
| This golden brown is how I like it. *FLIP* |
 |
| *SMOOSHES* |
 |
| A new baby taro blob <3 *SHOVES WITH SPATULA* |
 |
| The big one is ready...so I took it out of the pan... |
 |
| Now the little one is browned on one side...it's time for... |
 |
| *FLIPS* |
 |
| *SMOOSH* |
 |
| nudge~~ |
 |
| Cooking many at once!! |
 |
| Close up view of them...bottom is lightly browned by now... |
 |
| *FLIPS* |
 |
| I continued frying until I was satisfied with the color |
 |
| Hello my pretties :D |
 |
| OM* |
 |
| NOM* |
 |
| NOM* |
The adventures will continue...after some sleep...
ZZzzzz.....
Sweet Pea
No comments:
Post a Comment